Rosenberg Plumbing is a complex network of pipes, fixtures, and other apparatus that bring water into buildings and remove waste. Its regulations are designed to keep water safe and ensure a clean environment.
One key aspect of plumbing is knowing how to size pipes correctly. The easiest way to do this is by using a digital caliper.
Pipes are tubes that transport fluids, whether it’s water, sewage, gas, or other chemicals. They come in a variety of shapes, sizes, and materials. The type of pipe chosen depends on the nature of the transported substance and other factors, such as pressure and temperature requirements. A licensed plumber can evaluate the pros and cons of different pipes to ensure they’re suited for their intended purposes.
The most common plumbing pipes are PVC, PEX, copper, and cast iron. Each offers unique advantages, but the best choice will depend on the specific needs of each individual home. For instance, a drain line will require a smaller pipe diameter than a water supply line. Choosing the wrong type of pipe could result in problems, like clogged drains or burst pipes.
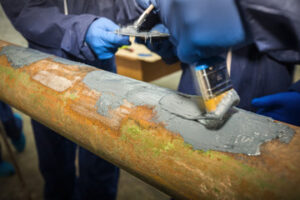
Another important consideration when choosing a piping system is its durability. Some piping systems must endure extreme temperatures and pressures, while others must be able to resist corrosion or other environmental hazards. The material of a pipe is also an important factor when it comes to its longevity and efficiency.
Stainless steel pipes are commonly used for high-temperature applications, while galvanized steel pipes are ideal for many heavy-duty plumbing projects in commercial buildings. These pipes are typically heat-treated, which improves their strength and enables them to withstand greater pressures and temperatures. They also feature a protective coating that reduces their vulnerability to rusting and corrosion. Moreover, they can be easily bent to fit around corners and are available in a wide range of colors and lengths.
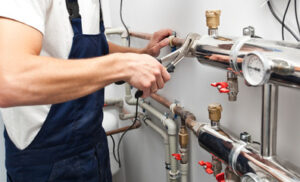
Valves
Valves are mechanical devices that control, direct or regulate the flow of fluids-liquids, gasses and slurries-by opening, closing or partially obstructing passageways within a system. They play a critical role in countless industries, including oil and gas, water treatment, and domestic plumbing. They are used to ensure optimal flow rates, prevent aberrations that could affect system performance and provide isolation and safety functions. In industrial settings, they are also used for backflow prevention.
Plumbing valves come in various shapes, sizes and materials. The type of valve that is ideal for a specific application depends on the needs of the system. For example, ball valves are best for on/off control and quick modulation, while gate valves are better suited to isolation applications. Other considerations include a valve’s operating conditions, such as pressure and temperature ratings.
Whether you’re piping liquids, solids or gases, it’s important to select the right valve for your project. Not only can selecting the wrong valve lead to costly downtime and repairs, but it can also impact how well a piping system performs.
Valves can range in size and design, but they all accomplish the same basic function of regulating or controlling flow and pressure. This is especially true in industrial plants, where valves play a critical role in operations and maintenance. The right valve will allow your process to operate exactly as it should for years to come. But the wrong one may cause problems like leaks, uncontrolled flow, and even explosions. The most effective valves are designed to withstand a variety of conditions, and they’re engineered with an expected service life in mind. This includes the ability to withstand high temperatures, low pressures, and the potential for corrosion over time.
Fittings
Pipe fittings are used to connect, control, and redirect the flow of water or gases in a piping system. They come in a wide variety of sizes, shapes, and materials. They are designed to withstand the high pressures and temperatures associated with piping systems. They also play an important role in preventing leaks, which can lead to costly repairs and damage to your home or business. Leaks can be caused by many factors, including corrosion, changes in temperature, and poor installation. Understanding what types of fittings are available can help you identify the best ones for your project.
Some common types of pipe fittings include elbows, tees, crosses, reducers, unions, and nipples. An elbow is a pipe fitting that is installed between two long pipes to change the angle of their run. It is typically shaped like a T and comes in 90 and 45-degree angles. A tee fitting is used to merge two or more inlets into one outlet. This type of fitting is referred to as an equal tee when its three sides are the same size and unequal tee when its three sides differ in size.
A cross fitting is a T-shaped pipe that combines the flows of two or more pipes. These are commonly used in drainage systems to maintain directional flow. A nipple is a short stump of pipe with threaded ends that are typically made of brass, copper, or CPVC. It has external male pipe threads that can be connected to other plumbing fittings. A nipple is often used to join tubing or flexible hoses to pipes.
Industry standards
Industry standards are established guidelines, criteria, or benchmarks that are widely accepted and used within a specific industry to ensure consistency and best practices. They are often set by regulatory bodies or professional associations and can include everything from product specifications to safety procedures. These standards are designed to improve product quality and safety, as well as streamline processes and reduce costs.
These standards are different from formal standards issued by recognized agencies, such as the Occupational Safety and Health Administration (051-IA) or American National Standards Institute (ANSI). Instead, they are based on custom and practice and are not legally binding. They also tend to be more flexible, as they allow for engineering analysis and judgment.
For consumers, industry standards provide confidence that products and services meet acceptable quality, safety, and performance criteria. In addition, businesses adhere to industry standards in order to maintain a high level of quality control, achieve certifications, and comply with regulatory requirements. By following these standards, companies can enhance their reputation, improve operational efficiency, and increase competitiveness. This is the best way to make sure that your company can deliver the highest possible value for its customers.
Local regulations
Local plumbing codes are set by municipalities to regulate construction and safety standards. They ensure everything from water supply lines to sewage systems operate efficiently and safely. It is essential for anyone involved in building and renovation projects to understand these regulations so they can make sure their work complies with them.
For example, New York State plumbing code outlines minimum requirements for pipe installation and maintenance. The guidelines include strict design and installation standards that protect life, health, and property. For instance, the code states that pipes measuring 2 inches or smaller must include guides installed between vertical supports to prevent movement. It also specifies that condensate drains cannot directly connect to any plumbing drain, waste, or vent pipe. Understanding these key plumbing regulations can help construction professionals maintain safety and uphold public welfare in their projects.
The code also outlines the correct size of piping based on potential system demand from installed fixtures. This is important to avoid sewage or hazardous gas backups, which can cause respiratory issues in building occupants. Similarly, it is important to properly size the drain, waste, and vent (DWV) system so that it can evacuate liquid and solid waste effectively.
To ensure that your plumbing project complies with the local code, it is recommended to hire a licensed professional who understands the current regulations. They should be able to obtain permits for your project and ensure that all plumbing installations are carried out according to the latest plumbing codes. In addition, they should be able to answer any questions you may have about the local code. They should also be able to provide references from past clients.