Mold Removal

Mold Inspection and Remediation

Mold Inspection Staten Island paints a clear picture of what’s going on in a home. It uncovers the extent of a mold problem, assesses risks to occupants’ health and provides remediation options.

Mold Inspection

When a professional comes to perform testing, shut off any air purifiers or humidifiers. Doing so maximizes the concentration of spores for easier detection.

The first step in any mold inspection is determining how much moisture exists. Moisture leads to mold, and the more moisture is present, the more serious the problem will be. During the inspection, your mold tester will look for signs of moisture, such as watermarks on walls or ceilings, damp areas behind wallboards and carpeting and musty smells. They will also check for leaking pipes, roof leaks and high humidity levels. They will especially look in basements, crawl spaces and bathrooms where a lot of moisture is likely to occur.

During this stage, your mold inspector will also take a sample of air from the space where the mold is suspected. This sample will be tested for the presence of harmful mycotoxins, which are toxic chemicals produced by some types of mold. The air sample will also be tested for the concentration of spores, which are released into the air as mold grows. The spore concentration in the air will be compared to the concentration of spores in an outdoor sample.

This inspection will also include checking for other conditions that can lead to mold, such as a lack of ventilation and the presence of pests and wood rot. The inspector will also check the grading of the property, as mold often develops in areas that are not well ventilated and where soil is prone to shifting and flooding.

When looking at a potential new home, you should always be on the lookout for signs of mold, particularly if you have allergies or other respiratory problems. Inhaling mold spores can trigger symptoms such as fatigue, coughing, wheezing, skin rashes and throat irritation. In some cases, inhaling certain types of mold spores can even cause life-threatening lung infections.

A thorough mold inspection can help identify the type of fungi in the house, as well as locating hidden areas where mold may be lurking, such as behind latex paint and inside walls and ceilings. Black mold, known as Stachybotrys chartarum, is a particular concern and requires immediate remediation. This type of mold is harder to remove than other varieties and can actually damage the structure of a building if left untreated.

Air Sampling

Air sampling is a key part of a mold inspection. It determines the types and concentration of mold spores in your home’s air. Inspectors typically take several air samples throughout the house and send them to a lab for analysis. The lab then identifies the type of mold in each sample. This information helps pros figure out how serious a problem is and what remediation techniques will work best.

The key to successful air testing is comparing the results with outdoor data. The air inside your home will be different from the outside because of things like weather conditions, the life cycles of mold spores and the amount of ventilation. The lab will then compare the spore counts of your indoor and outdoor samples to see how similar they are. The goal is for the indoor spore count to be lower than the outdoor sample.

To get the most accurate air data, your technician should collect the outdoor and indoor samples at the same time. If the two samples are collected too far apart, there could be an environmental change that affects spore counts. For example, a sudden storm might bring in more spores from the outside, which would cause your indoor spore count to be higher than it should be.

There are two types of air sampling: nonviable and viable. Viable tests use a culture to identify the types of mold in a sample, but this process takes a lot of time. Nonviable air tests, on the other hand, can give you a much quicker result. They use a device that pumps air over a sticky substance that traps the spores. These tests reveal only the genus of mold — not the specific species – but they can still be useful for determining the severity of a problem.

Even though these two types of tests can be useful, they are not the only tools that a professional should use when evaluating a home for potential problems. It is important for your mold expert to also evaluate the property visually and take surface samples, especially in areas that you suspect are affected by a moisture problem. This way, he or she can determine whether the problems are caused by mold, humidity, or some other issue that needs to be addressed with professional remediation techniques.

Culture Tests

Mold spores need an environment, food and moisture to grow. When they’re inhaled, the spores can cause a variety of symptoms including headaches, fatigue, skin rashes, throat irritation, and respiratory infections. Identifying the source of the problem, such as water damage or high humidity, is key to prevent further problems and protect your family’s health.

A mold inspection typically includes air and surface sampling. The inspection also looks for signs of water damage and the condition of roof and plumbing systems. If a property has been flooded in the past, look for discoloration on walls and ceilings, especially behind latex paint. Look for sagging and warped ceilings, and check the ground around the foundation to make sure it slopes away from the house.

If you suspect the home has a serious problem, a mold inspector can perform a swab test to determine the presence of fungal spores. This will cost you more than a general mold inspection but is essential for determining which types of mold are present in the home.

Surface sampling can be included as part of a standard inspection, but more extensive testing will incur an additional charge. Swab samples require a small amount of liquid, which is placed on a slide and sent for analysis. The test results provide information about the type and quantity of fungi that are present.

The swab test can help identify what species of mold is in the home, and whether any are toxic. Depending on the type of fungi, additional tests may be required. For example, black mold (Stachybotrys chartarum) can be difficult to identify, and requires a culture sample to determine the specific type.

The most important aspect of any mold inspection is to take a thorough walk-through of the property. Look in every nook and cranny, including the attic and crawlspaces. Look for water damage, and pay special attention to tucked away areas, like closets, attic rafters and the corners under cabinets. Also, look at the grading of the land around the house, to ensure that the ground slopes away from the foundation. This will help prevent water from entering the basement and lower your risk of a mold infestation.

Remediation Options

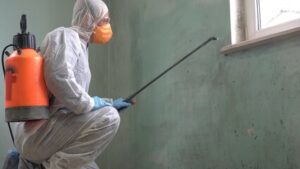
When a home has substantial mold growth, it requires professional remediation to clean and remove the affected areas and restore air quality. Remediation also involves repairing the source of moisture so that future growth is prevented.

A trained, licensed mold inspector will assess the contamination in your home to determine the extent of damage and recommend remediation options. They will take visual samples of the mold and moisture, and if necessary, perform an air test to evaluate the spore count in your home.

Mold tests provide valuable information about what’s present, but they’re no substitute for a thorough visual inspection. It’s essential that your inspector checks places that aren’t easily accessible, including behind walls and beneath flooring or ceiling tubes. In most cases, mold growth results from water damage that allows spores to settle and begin growing.

The spores collected by the swab, tape or bulk sample are then sent to a lab for analysis and identification. These tests can confirm whether or not a specific mold is present, but they don’t indicate the size of the contamination. The only way to know the size of a mold colony is to conduct a swab, tape or air cell testing in multiple locations throughout the home.

Molds grow best in moist environments and a visual inspection will reveal a variety of surface growths as well as the underlying cause of the contamination. In addition, experienced inspectors look for spores in the surrounding areas of the mold to help estimate how far it has spread. This is especially important since mold spores can attach to other surfaces and begin growing without being visible.

Cleaning Services

The Importance Of Roof Cleaning

Keeping your roof clean helps to prevent the growth of moss and algae which can eat away at the shingles. It also helps to protect the structure of your home and increase its resale value.

Moss and algae build up impedes your roof’s ability to reflect sunlight. This can cause your energy bills to rise. Contact Sarasota Roof Cleaning now!

roof cleaning

Debris Removal

Debris from the environment can cause serious damage to a roof. Leaves, pine needles, twigs and branches will quickly build up on your roof if they aren’t removed regularly. They can conceal areas of the roof which are in need of repair, impede rain flow and become a home to pests.

Debris is typically removed from a roof during a cleaning by blowing it off. This method is only viable for light debris such as leaves, needles and twigs. It’s not safe to use on a steep roof or in windy conditions, and it is likely that some debris will blow into gutters during the process. This is why it’s important to check the gutter system during a debris cleaning and remove any remaining debris.

Sweeping the roof is another way to clear debris. It’s more labor intensive but is better suited for small amounts of debris like leaves and pine needles. It’s also more safe than using a blower, especially on a steep or pitched roof. Sweeping should be done during daylight hours and in calm weather. Ideally, the area being swept should be covered with plastic sheets to protect valuable house objects from dirt and dust.

A thorough roof cleaning will also examine the gutter and drain systems to ensure they are free from clogs and are functioning properly. During this process, a professional will also look for any bare spots in the roof’s surface which could indicate that water is entering the home and causing damage.

It’s important to remember that the roof is an integral part of the house and should be treated with care. A roof is a huge investment and will protect the family from harmful weather, so it’s worth the effort to keep it in good condition. Leaving it to accumulate debris can lead to expensive damage and a host of problems, including water leaks and algae growth. Regular roof cleaning can help prevent these problems and prolong the life of a roofing system. Contact a professional to learn more about roof cleaning and schedule a time for your home’s roof to be cleaned.

Algae Removal

Algae spores spread quickly, so it’s important to remove them regularly before they consume shingles. A specialized cleaning solution that’s approved by your roof shingle manufacturer is the best option.

It’s common for algae to cause dark streaks or stains that make your roof look old and run down. These stains are often mistaken for mold or mildew but actually come from algae, a type of plant that lacks roots and stems but does contain chlorophyll, the green pigment that gives plants their color. Algae spores travel through the air and can be spread by birds, animals, or even humans. They can also cling to raindrops and be carried by wind, water, or other sources.

While it’s possible to clean algae stains with bleach, the results are short-lived and the problem will most likely return. According to the Asphalt Roofing Manufacturers Association (ARMA), bleach and high-pressure washing will only strip the surface of your roof and can leave you with an uneven appearance.

Using a 50:50 mixture of laundry strength liquid chlorine bleach and water can kill the spores and remove most of the staining. It’s best to spray this mixture and let it sit for 30 minutes before rinsing. As with moss removal, it’s important to use this method sparingly as the harsh chemicals may damage your gutter systems and roof flashing.

Another popular algae removal method is to scrub the roof with a soft brush. This can be quite labor intensive and time consuming, but it does work. Just be sure to wear rubber gloves and non slip shoes as you’ll be climbing on a slippery wet roof.

Once your shingles are clean, you can try to prevent future problems by removing any standing water and trimming tree branches. This will help to keep moisture at bay and protect your shingles from premature aging and rotting.

Using a specialized roof cleaning solution is the best way to ensure that your home looks great and is protected from the elements for years to come. Professionals can provide you with the right mix of chemicals to effectively remove moss and algae from your roof while keeping it looking its best.

Moss Removal

Moss on roofs can lead to shingle deterioration and is difficult to remove without damaging the shingles. There are many different methods for removing moss from a roof, including physically brushing the moss off with a push broom and/or chemically scrubbing the moss with a scrub brush or using a moss killer solution. Some roof cleaning professionals use a combination of both approaches. Regardless of the approach, the dead moss needs to be rinsed off or removed from the roof to prevent water and moisture accumulation that can lead to other types of damage.

The first step in a moss removal process is to physically scrub the moss with a long-handled brush or putty knife or 5-in-1 painter’s tool. Start in a corner of the roof and work your way across the surface, moving downward to protect the shingles. Work on a small section at a time so you can control your brush and scrubbing motions more effectively. Be sure to wear rubber gloves and goggles to protect yourself from spores and chemical solutions.

If the moss is still visibly green, you’ll need to apply a moss killer solution. This can be a store-bought cleaner or a homemade mixture. You’ll want to follow the manufacturer’s instructions on how long to leave the cleaner or moss killer on the moss.

A moss killer should be left on the roof for at least 20 to 30 minutes. After that, the moss should be rinsed off with a garden hose or a power washer with a low pressure setting to avoid shingle damage.

After rinsing off the moss, you’ll need to let the roof dry before proceeding with any further roof cleaning. If you’ve used a chemical moss killer, it will take at least two weeks for the moss to turn brown and then begin to fall off on its own. If you’re unsure of how to proceed, consult with a roofing professional.

Dirt Removal

When dirt accumulates on your roof, it holds extra moisture against shingles and roof paper. This leads to shingle and paper deterioration, which in turn can cause water leaks in your home. Regular cleaning can help prevent dirt build-up from happening and keep your home safe from water damage.

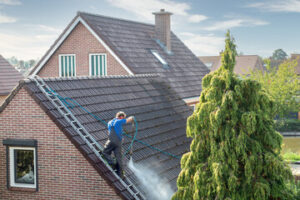
A professional roof cleaner can use different techniques to clean your home’s rooftop. They can either pressure wash the entire surface or they can use a soft washing process on more delicate roofing materials such as shingles. These methods can help get rid of dirt, algae, moss and other debris from your roof without damaging it. A clean roof can also increase your property value.

The cleaning process can take some time depending on the condition of your roof and the amount of dirt that is present. For instance, a roof with large amounts of moss and other growth can take longer than a normal roof to clean. It’s also important to hire a licensed roof cleaner who is experienced in handling different types of roofing material. They will know how to clean each type of roof and will be able to spot any areas that may require repairs.

A roof is a vital part of a building, as it protects the interior and exterior of your house from weather elements such as rain, wind, snow, and heat. While it’s durable and can withstand the harsh outdoor environment, a roof can still wear down over time and requires regular cleaning to prevent deterioration. A professional roof cleaning can restore the beauty of your home and extend its lifespan. If you are considering selling your home in the future, a clean roof can attract potential buyers and boost its value.

Home Improvement

Insulation Removal Can Lower Energy Use and Improve Comfort

Perth Insulation Removal can feel like a daunting task for homeowners. But it can also help lower energy bills and make your home more comfortable year-round.

Insulation Removal

While batting insulation can be easily rolled up and carried away, blown in, or loose fill insulation is a more complex matter. Here’s what to consider to ensure a smooth, safe and effective project:

Insulation removal is the process of taking out existing insulation in your attic, crawlspace or walls and disposing of it. It’s typically done as part of an energy audit or to replace old, worn out insulation. Older insulation types like balsamic wool and cellulose (made from recycled newspaper) may contain asbestos which needs to be removed by trained professionals in full safety equipment.

One of the first things that a professional insulation removal crew will do is to inspect your attic or crawlspace. They will take stock of the entire space to see how much room they have to work with and where any low spots or obstacles are. They will also make sure that they have enough equipment to complete the project in a safe and effective manner.

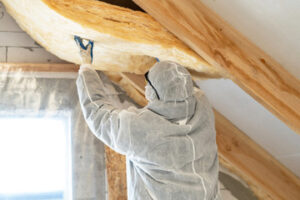
Once the inspection is complete, they will begin to roll up or blot out any contaminated insulation. This is especially important for blown-in fiberglass insulation since they’ll have to feed the large vacuum hose up into your attic space to get it all out. The contractor will carefully suck the old insulation into sealed bags for disposal, making sure not to get any contaminates into the rest of your home or attic space.

The other main reason that insulation is replaced is to address damage. Frequently, moisture is a problem. Whether it’s from a roof leak or faulty plumbing, insulation that is saturated with water will lose its R-value and create a perfect environment for mold to grow. Water damaged insulation will also be a breeding ground for vermin. In many cases the best solution is to remove and replace the affected insulation as quickly as possible.

A common sign that it’s time for insulation replacement is an increase in your energy bills. Ineffective insulation can allow air to pass through insulated spaces, cooling or heating your house unevenly. It’s also worth considering replacing your current insulation if it has lost its R-value due to age, water damage or other factors. This will help your home to be more comfortable, reduce your energy costs and protect the health of your family and pets.

Safety

Insulation removal can be dangerous for homeowners who attempt it without the proper equipment. This is especially true for older fiberglass insulation containing asbestos and other hazardous materials that can cause health issues including lung cancer and mesothelioma.

Safety gear for an insulation removal project includes a hard hat, gloves, safety goggles and dust mask. The safety mask helps protect your face from fiberglass particles that can irritate the skin and eyes, while the hard hat helps protect your head from falling debris during the project. Wearing comfortable work clothes that you don’t mind getting dirty is also a good idea. It will help you stay focused on the task at hand rather than worrying about how you’ll look afterward!

It is also important to turn off any electricity in the attic before starting your insulation removal project. This will eliminate any risk of electrical shock and minimize the risk of fire hazards caused by mishandling or cutting live wires during the process.

While it is tempting to skip this step and get started right away, turning off the power or disconnecting the electricity will provide a much safer working environment for everyone involved in the insulation removal process. It will also help prevent any unnecessary damage to your home’s electrical systems that could result in a costly repair bill down the road.

Once the power is turned off, you will need to carefully inspect the area before beginning your insulation removal. Often times, the attic floor will contain weak spots that could collapse under you if you accidentally step on them. If you find any areas that are damaged or contaminated by mold, rodent droppings, or other debris it is best to leave the cleanup to the professionals.

Finally, you’ll want to make sure that your attic is fully ventilated during the insulation removal process. Ventilation will help keep your breathing easier while you’re working, and it can also minimize the amount of dust that ends up in your home. You should try to take a break and get fresh air every 15 minutes or so while you’re working in the attic, so that your body temperature doesn’t rise too high and become uncomfortable.

Equipment

If you have old or damaged insulation, removing it can save money, improve the comfort of your home, and help to reduce energy use. It may be a complicated process though. You will need to inspect the attic space and prepare it for the removal. It is also possible that you will have to dispose of contamination such as rodent feces, urine, nesting materials and bird and bat droppings. This can be difficult to do by hand and is time consuming.

Insulation removal machines can eliminate a lot of the mess and make the job go faster. These machines work by using a vacuum process to suck the insulation into the bag for disposal. They are typically gas powered and come with a long hose to reach the attic and large bags to collect the material. They can be rented or purchased. If you plan to do more than one job it is often cost effective to purchase.

You should also consider using a face mask, a respirator, or a dust mask to protect yourself from breathing in any fiberglass particles. They can sting your eyes and irritate the skin. They can also cause respiratory problems and lung damage. It is also important to wear gloves and protective clothing when working with any type of insulation material.

Other equipment you might need includes a small rake to break up any clumps of insulation. A ladder is also a good idea to access the attic space for the project.

Once you have the right equipment for the job, follow the steps outlined in this article to remove insulation and improve your home’s energy efficiency. Take a moment to cover the floor and walls before you start the process, and be sure to wear all your personal protective gear. You will also need to check with your city or county waste management organization to find out how to dispose of the old insulation. If you have any questions or concerns, contact a professional attic insulation contractor like Energia to discuss your project. They can provide you with more detailed information about the cost and process of insulation removal.

Disposal

A successful insulation removal project requires proper planning, preparation and safety precautions. Depending on the scope of the project, hiring professional assistance may be wise to ensure efficiency and safety.

The first step is to assess the condition of the insulation and determine the best method for removal. The type of insulation will also influence the process. For example, blown-in insulation can be removed using either a wet or dry method. The dry method uses specialized vacuum equipment to remove the material and avoids airborne particles. The wet method sprays the insulation with water or a solution to dampen it before removal. This can reduce the risk of mold growth and minimize the release of contaminants.

Once the necessary equipment is ready, it’s time to begin the removal process. Ensure the workspace is clear and protect any furniture or belongings from the mess. Cover or shield vents, windows, and other openings to prevent the spread of contaminants. It is important to keep the work area well-ventilated to avoid breathing in insulation fibers. Wear appropriate gear, including masks, gloves, and goggles. It is recommended to wear a respirator during the entire project.

As you move through the process of removing the old insulation, collect it in garbage bags and dispose of it when full. This is an ideal way to eliminate the debris without spreading it throughout your home. The bags can be taken to a dumpster rental company for proper disposal.

It is also important to find out if the old insulation contains hazardous materials, such as asbestos. This will help you plan for any additional steps and safety measures to follow. This information can be obtained through consultation with a professional or by conducting a test yourself. It’s important to find out whether the material is contaminated before starting a project.

If you do find that the old insulation does contain hazardous materials, it will need to be disposed of differently from other waste. Contact your local waste management or recycling center to find out what options are available. In many cases, this material can be recycled to create new energy and reduce landfill waste.

Home Improvement

Why You Should Invest in Replacement Windows

Investing in premium replacement windows is more than a home improvement project. It’s an investment that offers a return in energy savings, resale value and aesthetic beauty.

Replacement Windows

These types of windows fit into existing window openings and don’t require additional trim work or drywall repair. This makes them easier to install and less costly than new construction windows. Visit Website to learn more.

Energy efficient replacement windows are a great way to reduce your home’s energy consumption. These windows are built with insulated frames and Low-E glass, which minimizes heat transfer and prevents drafts. These windows help keep your home cooler in the summer and warmer in the winter, which will save you a lot of money on your utility bills.

Many energy-efficient window companies offer special rebates and incentives for their products, which can lower the upfront cost of new windows. Check the Database of State Incentives for Renewables and Efficiency (DSIRE) to find the available programs in your area. These programs can also cover the installation or labor costs of the windows.

When selecting replacement windows, be sure to look for those that are ENERGY STAR certified. These windows meet the highest standards for energy efficiency and are verified to save homeowners a significant amount of money on their energy bills.

In addition to reducing your energy consumption, new windows can also increase your home’s curb appeal and resale value. According to the 2020 Cost vs Value Report by Consumer Reports, homeowners who replace 10 existing single-hung windows with ENERGY STAR-certified windows can expect a return of 72.3% on investment.

One of the most significant benefits of new windows is their innate ability to limit outside noises from infiltrating your home. The same qualities that allow ENERGY STAR-certified windows to seal out exterior temperatures also give them an innate soundproofing ability. This can make a big difference if you live near a busy road or have noisy neighbors.

Another way in which new windows can improve your life is by protecting your belongings from UV rays. These rays can cause your carpeting, furniture, and other items to fade over time. Fortunately, most energy-efficient windows have a coating that blocks harmful UV rays, helping to protect your furnishings and artwork from fading and deterioration. This is a feature that is often overlooked when shopping for replacement windows, but it’s one that can greatly improve your lifestyle.

Increased Home Value

Many homeowners choose to upgrade their homes with the intention of increasing the resale value. Premium replacement windows are a popular choice for this reason, and they can deliver an excellent return on investment should you decide to sell your home in the future.

New window installation will improve the aesthetic of your house, which can increase its curb appeal. Besides, new windows will provide improved light and natural ventilation, which can also enhance the overall look of your property. Moreover, new windows will offer more functional features than older models such as better lock systems and easier to clean surfaces. This means that you will save a lot of money in the long run by using less energy to heat and cool your home.

According to various home improvement and real estate studies, new replacement windows rank high on the list of desired features for prospective buyers when it comes time to sell a home. This is because potential buyers can easily recoup the cost of the project by enjoying the energy efficiency and aesthetic benefits that come with it for years to come.

However, there are some important considerations to keep in mind before choosing the type of replacement window that will best suit your needs and meet your resale goals. For example, you should understand the difference between a pocket replacement window and a full frame construction before making your decision. A full frame replacement is typically used for new homes or new additions, while a pocket replacement can be installed in an existing window opening with the siding and trim still in place.

Other factors to consider include the age of your current windows and whether they are functioning properly. Older windows tend to have a greater tendency to let in drafts, which can lead to increased heating and cooling costs. Moreover, they may not open and close as easily as newer models with improved functionality. Moreover, they may have significant damage or decay, which can affect their appearance and cause water leakage. All these problems can be easily solved with the help of a reliable replacement window company.

Aesthetics

Aesthetics is the branch of philosophy that deals with the appreciation of beauty. It has traditionally focused on the appreciation of art but is now a wide discipline that encompasses many different fields. Aesthetics includes a broad range of concepts and is concerned with such things as the organization, unity, balance, and harmony of forms and their formal properties. It also looks at the way that objects evoke emotions in people and the relationship between a work of art and its audience.

Replacement windows are a great home improvement project because they can help improve your view, bring in more natural light, and increase your home’s resale value. New windows are also designed to save you time with convenient features like between-the-glass blinds and sashes that tilt in for easy cleaning. Additionally, if you are looking to add a touch of style or curb appeal to your home, there are many options for exterior cladding and finishes to enhance your home’s look.

There are two main types of replacement windows – full frame and pocket replacement windows. Full frame replacement windows replace the existing window and frame with a new window and installation system. This type of replacement is typically done in homes that have a clear opening where the window was previously installed. You can tell if your home has this type of opening because it will have nail fins around the frame.

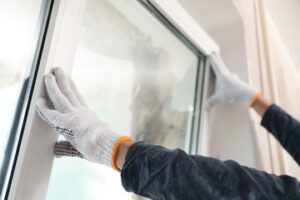
On the other hand, pocket replacement windows are designed to slip horizontally into an existing window frame. This type of replacement is often used in remodeling projects where the original window frame has been damaged or replaced. Pocket replacement windows are available for both new construction and existing homes.

You can easily tell if your home has these type of openings because they will have molded fins on the side that are meant to snap off. It is important to note that you should not try to remove the molded fins on your own because it could compromise the window’s structural integrity or break the glass in the sash.

Increased Comfort

We all know that windows are a key element in the overall look of any home, but they also play a big role in ventilation, light levels and temperature control throughout a property. Old windows can be drafty and cause high energy bills, but new replacement windows are much more efficient and will save you money over time.

Replacement windows allow more natural light into the property which creates a brighter and more comfortable environment. They can also come in a variety of different styles and materials which can add to the style of any house or building. Double hung windows are an ideal choice as they suit many different styles of homes, while casement windows open out to a beautiful view and refreshing breezes.

Another important benefit of replacing your windows is that they are easier to open and close. Many older windows become stuck or difficult to open and can even break if you apply too much force. New windows, on the other hand, are designed with safety and ease of use in mind. They can be easily opened and closed by sliding or tilting, which makes them a lot more convenient to clean.

New replacement windows also provide better insulation than their older counterparts. Single pane windows can allow radiant heat to escape the dwelling, but newer window designs use double or even triple panes with argon gas between them which prevents heat transfer and helps keep temperatures consistent throughout the year.

Lastly, properly installed replacement windows are designed to form a tight seal to prevent air leaks. This will help reduce your energy costs as climate-controlled air stays in the house and does not escape outside. This will help you save money on your energy bill and reduce the amount of fossil fuels being used in the household.

The benefits of replacing your windows are substantial and a worthwhile investment. Not only will they increase the value of your home but will also make it more comfortable to live in. If you are looking to make any changes to your property, it is a good idea to consult with professionals and discuss the different options available to you.